Late evening calls, reverted releases, lost revenue, and eventually fear of touching anything in legacy code not to break something. Nobody likes that. Do you know what is one of the best ways to avoid this? Integration tests!
We at Kiwi.com use Cypress.io for some time, and we already had to rethink how we write such tests to keep them efficient and stable. One topic that plays a role in it sometimes remains forgotten: configuration. In this post, we would like to share with you some tips on how we now set up Cypress tests with Typescript support for a typical GitLab CI pipeline.
Before we start…
You can see all topics discussed here in the following repository: https://gitlab.com/jaroslav-kubicek/cypress-example
Back to Basics
Beginnings are fairly easy and well described in the documentation. First, we install cypress from npm and run yarn cypress open to get the autogenerated skeleton. After adding the typescript, renaming files to .ts and reshuffling, we get a structure like this:
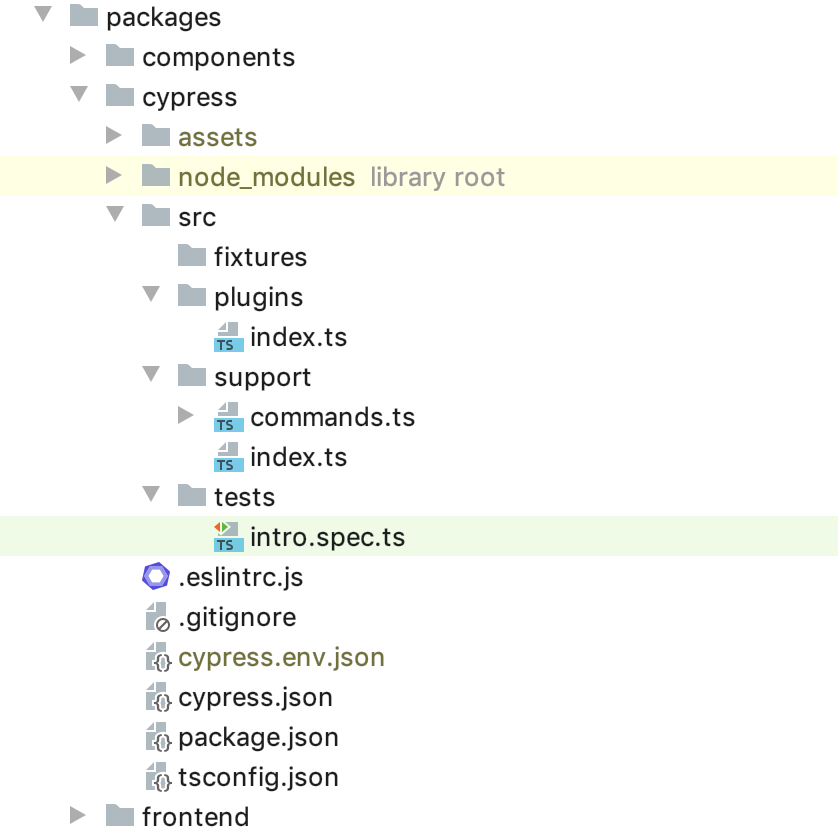
Notice that we use monorepo setup with yarn workspaces — our tests are placed there along with our frontend. To get that, we had to change some paths in cypress.json:
{
  "fixturesFolder": "src/fixtures",
  "integrationFolder": "src/tests",
  "pluginsFile": "src/plugins",
  "supportFile": "src/support",
  "screenshotsFolder": "assets/screenshots",
  "videosFolder": "assets/videos"
}
Every time we run a test, all screenshots and videos are stored in the assets folder. Trust me, you don’t want to commit it accidentally, so we will add the following lines to .gitignore with possible env file:
assets
cypress.env.json
As we want to follow the best practices and write clean code, we will add ESLint too. Since it’s already there for the whole repository, we need to just extend it: yarn workspace cypress-tests add eslint-plugin-cypress --dev to install eslint-plugin-cypress in our cypress workspace and then we create .eslintrc.js:
module.exports = {
  extends: ["plugin:cypress/recommended"],
  plugins: ["eslint-plugin-cypress"],
  rules: {
    // does not make sense in Cypress world
    "promise/prefer-await-to-then": OFF,
  },
};
Your exact configuration may vary, but the philosophy is the same — you should have one root ESLint configuration and override only what’s necessary for the given workspace. For example, we force devs to use async/await in unit tests but not here in cypress tests, so we turned off the promise/prefer-await-to-then rule as cypress commands are not regular promises.
Let’s write the first test
Now it’s about the time to finally add some tests. For the beginning, we will check just that the Kiwi.com homepage is loaded, the navbar on top is shown and a user can open the hamburger menu:
describe("Landing page", () => {
  it("shows navigation menu", () => {
    cy.visit("/");
    cy.get("[data-test='NavBar']").should("be.visible");
    cy.get("[data-test='NavBar-SideNav-Open']").click();
    cy.get("[data-test='NavBar-SideNav']").should("be.visible");
  });
});
And the resulting code is…ewww, not great, not terrible.
- We follow best practices by using data-test attributes for selectors, but it’s a lot of writing, and we have to use quotes inside the string.
- After a couple of weeks or months, it might not be clear what exactly is happening in the test.
We can do a lot better! In the beginning, we might be tempted to add a custom command to select elements more easily, something like cy.getByDataTest("NavBar"). It turns out there is even a better solution. We use Testing Library for unit tests and there is a variant for Cypress too. Let’s use it:
yarn workspace cypress-tests add @testing-library/cypressto install the lib.- In
tsconfig.json, we add support for types:"types": ["cypress", "@types/testing-library__cypress"]. - We upgrade
src/support/index.tsfile to make use of it:
import "@testing-library/cypress/add-commands";
import { configure } from "@testing-library/cypress";

import "./commands";

configure({ testIdAttribute: "data-test" });
And this is how we rewrite our test:
describe("Landing page", () => {
  it("shows navigation menu", () => {
    cy.visit("/");
    cy.findByTestId("NavBar").should("be.visible");

    cy.log("🍔 menu can be opened");
    cy.findByTestId("NavBar-SideNav-Open").click();
    cy.findByTestId("NavBar-SideNav").should("be.visible");
  });
});
Small changes make wonders. Selecting elements on the page is no longer cumbersome. We also increased readability by adding cy.log.
cy.log may seem unnecessary but we learned this a hard way. The complexity of both application and user scenarios tends to increase over time, real specs files are usually longer and when the test suddenly starts failing after months, it might be challenging to understand at first what the hell we do at that exact step, even with a screenshot or video recording. So make your future self happier by documenting each logical user step… or consider the BDD approach with cucumber.
Going live in GitLab CI
Alright, we’ve implemented the first test and it passes locally, now it’s important to incorporate it to our continuous integration to make sure our application works before we merge our changes.
As we use GitLab CI, we’re gonna extend our .gitlab-ci.yml file:
variables:
  CYPRESS_CACHE_FOLDER: $CI_PROJECT_DIR/.cache/Cypress

cache:
  key:
    files:
      - yarn.lock
    prefix: $CI_PROJECT_PATH_SLUG
  paths:
    - .cache
    - node_modules
    - packages/*/node_modules
  policy: pull

cypress:
  stage: verify
  environment:
    name: review/$CI_COMMIT_REF_SLUG
  image: cypress/browsers:node12.18.0-chrome83-ff77
  script:
    - yarn --frozen-lockfile
    - export CYPRESS_BASE_URL="https://$CI_ENVIRONMENT_SLUG.$KUBE_BASE_DOMAIN"
    - yarn workspace cypress-tests cypress run -b chrome --headless
  artifacts:
    when: on_failure
    expire_in: 3 days
    paths:
      - packages/cypress/assets
Again, your exact configuration will vary depending on your use case and used tech stack, but here are some important points:
- Cypress needs binaries for its execution, so if we cache
node_modulesdependencies in GitLab CI cache, we define where such binaries should be stored with aCYPRESS_CACHE_FOLDERvariable. Then we have to include this path in the cache. - Notice we use
yarn.lockas a key. This enables us to reuse cache even between different branches if dependencies haven’t changed. - We run our tests in headless chrome and store screenshots and video recordings if it fails.
- To run tests successfully, we had to tell Cypress against which URL it should be run. Such URL is usually created dynamically depending on the branch name. We set it through
CYPRESS_BASE_URLvariable. Notice we had to specify the environment name in the job definition too:review/$CI_COMMIT_REF_SLUGin our case. This is necessary to have access to the environment variables related to the specific environment and should usually correspond 1:1 to the job definition of your deployment.
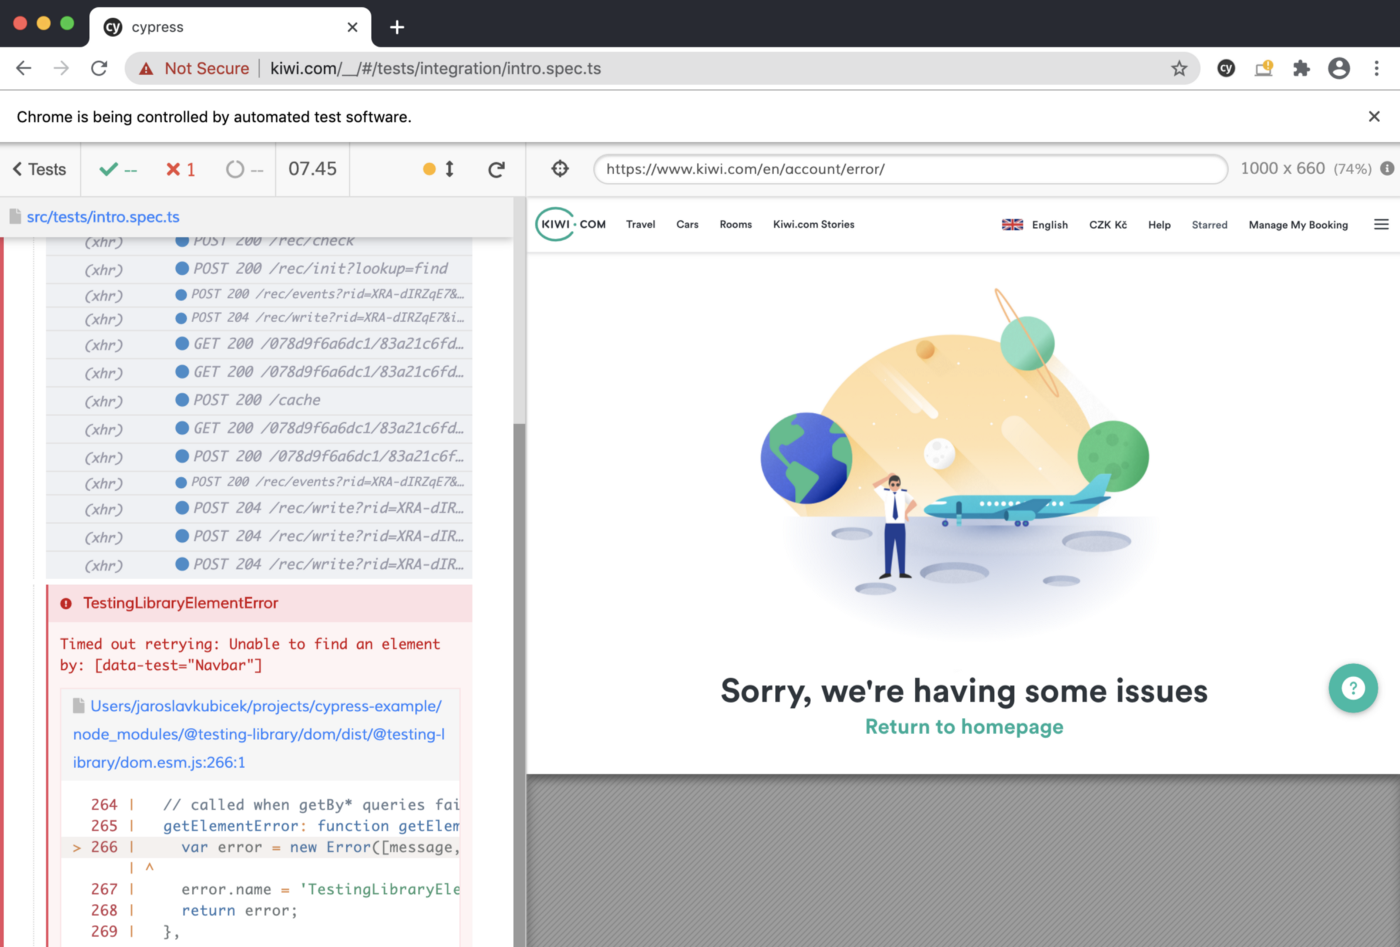
…annnnd it fails
This article was written before version 6.0.0 came out which now passes
disable-dev-shm-usagelaunch switch to chrome browser by default. Following workaround is therefore no longer necessary as it's done automatically for you.If you are still facing such issues, check out the amount of available resources in your CI or try
xvfbmentioned below.
Suppose you pushed commits to the repository, a merge request went through review and was merged. Everything was up & green. Then you went to the office the next day and your colleague asked you to help with the failed job.
The output shows a weird error:
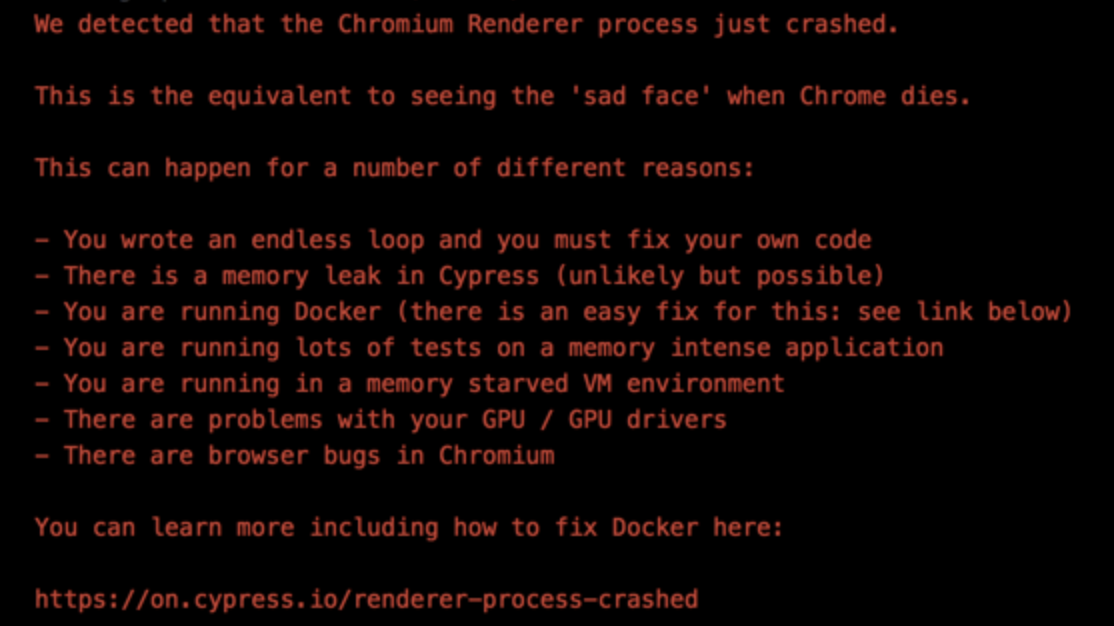
Or almost nothing while the job execution hung up:
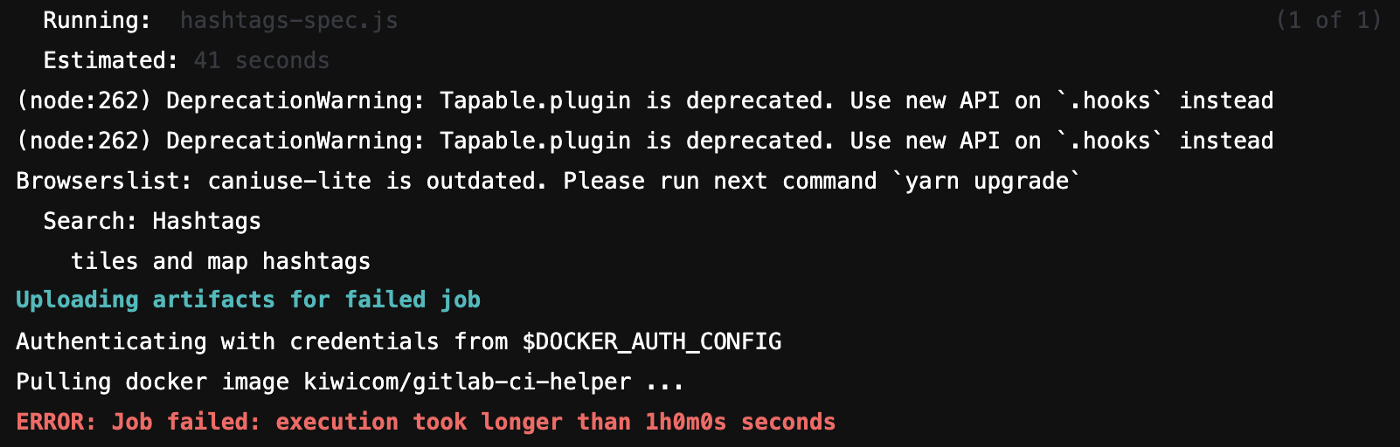
The usual common denominator of these issues occurring only in GitLab CI is virtual shared memory. The job runner always runs some Docker image and the default setting (64 MB) is too small for a modern browser.
You have several options: either ask DevOps to change GitLab configuration to run Docker images with bigger shared memory (with --shm-size an argument to docker run command where it’s questionable what’s enough), or add shm to volumes (/dev/shm:/dev/shm), or change IPC mode (--ipc=host which might be refused due to security concerns), or you can just disable it for chromium browsers.
To do so, use Cypress Browser Launch API to alter command-line arguments:
module.exports = (
  on: Cypress.PluginEvents,
  config: Cypress.PluginConfigOptions,
) => {
  on("before:browser:launch", (browser = {}, launchOptions) => {
    if (browser.family === "chromium") {
      launchOptions.args.push("--disable-dev-shm-usage");
    }

    return launchOptions;
  })
};
Chrome will fall back to using temp files instead.
After several attempts, we found out that using X virtual framebuffer (Xvfb) with Chrome also greatly increased stability:
xvfb-run cypress run -b chrome
Growing up
What started with a single test grew into a full suite. Now one of the hottest concerns in your team is probably the speed of tests, prolonging the execution of the whole pipeline for every merge request.
Although it’s not the only way how to tackle it, it’s definitely one of the easiest — parallelization using the paid Cypress Dashboard. It requires two lines of code change in .gitlab-ci.yml:
# other lines remain the same
cypress:
  script:
    - yarn workspace cypress-tests cypress run -b chrome --headless --record
  parallel: 3
With parallel: 3 GitLab CI will schedule three parallel jobs that will execute the same script. That would normally lead to executing tests three times, but thanks to --record flag, Cypress will send all spec files to Dashboard service first and Dashboard redistributes tests back to GitLab runners based on previous runs.
Don’t forget that you have to set CYPRESS_RECORD_KEY environment variable in GitLab to be able to use Dashboard with --record flag:

Given you have twelve spec files, each worker will likely get four files back to execute. But it might be just two: for example, if one of your tests is time-consuming and gets several minutes to execute, it’s usually scheduled the first and the runner receiving such spec might get only one more. The exact behavior depends on our context and current magic hidden behind Dashboard.
Parallelization through Cypress Dashboard this way has one crucial drawback: if any of your tests fail and you trigger a rerun, all tests will get executed again.
Luckily, Cypress.io team has just released version 5.x with test retries. So little momentary hiccups do not jeopardize your execution: if some of your tests are a little flaky and fail, they’re retried again before reported as failed.
If you are still on the older version and can’t update, cypress-plugin-retries plugin does the same as test retries in 5.x.
Neverlethess, as we learned the hard way, it might not be that easy even with retries — especially if you didn’t follow the best practices before. In case we would implement our first test as follow:
describe("Landing page", () => {
  before(() => {
    cy.visit("/");
  });

  it("shows navigation menu", () => {
    cy.findByTestId("NavBar").should("be.visible");

    cy.log("🍔 menu can be opened");
    cy.findByTestId("NavBar-SideNav-Open").click();
    cy.findByTestId("NavBar-SideNav").should("be.visible");
  });
});
Why? That’s because our “shows the navigation menu” test is not retriable.
Before hook is guaranteed to run only once so when the test fails, before is not run again and we suddenly miss the beginning — visiting our page. As a rule of thumb, you shall almost never use before hooks as there isn’t usually a need for them. Also, use beforeEach only for real test initialization: seeding database, setting correct cookies, etc.
Every interaction with the web page should be done inside the test.
And, of course, don’t forget the first rule of the Cypress club: do not share any state between tests.
Cypress tests are one of the key pieces that keep us from riding Kübler-Ross curve every time we want to release something. At the same time, it’s still programming, vulnerable to similar afflictions as any other code.
As you could see, the profound configuration is the first step into having stable tests on which you can rely.
This article was originally published for code.kiwi.com.